
Celestial Island is already one of the best ways to gain resources for free, but Adventure Mode makes those gains a hundred times greater.
In Adventure Mode you set sails on an adventure that lasts from a few weeks to over a month, granting you rewards along the way and a final epic reward once the adventure is complete.
There are some caveats on strategies you should consider, like which adventure to choose, what to upgrade on your ship and what to buy from the merchant. Everything will be answered here.
How Adventure Mode works on Celestial Island
First off, in order unlock Adventure in Idle Heroes, you need to upgrade your Watch Tower to level 6.
Once unlocked, you have to select an adventure, most of which will be hidden at first as you will find more as you progress.
When selecting the adventure, you will see rewards that you will gain once the voyage is completed.
After that you need to set your offensive lineup when battling other ships and then you’re ready to set sail.
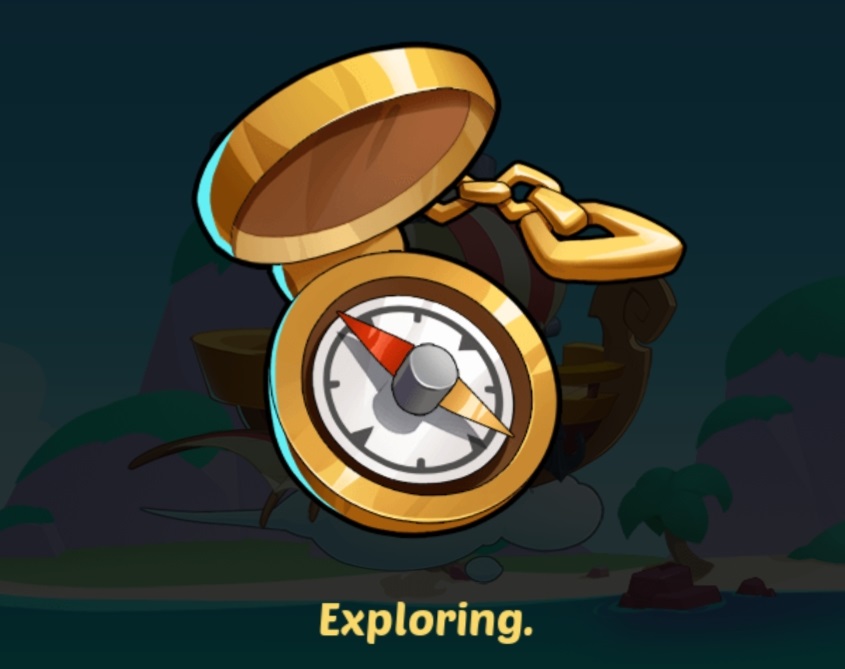
While sailing, you will passively gain progress or you can use Stamina which is regenerates 1 stamina per 144 minutes to a maximum of 10.
Using stamina to Explore, will trigger a random event which might consist of more rewards, a merchant, faster progression or a battle which can also grant your faster progression depending on the outcome.
Stamina will always start at 10 on a new journey so it’s best to try and use it all before the end of a cruise.
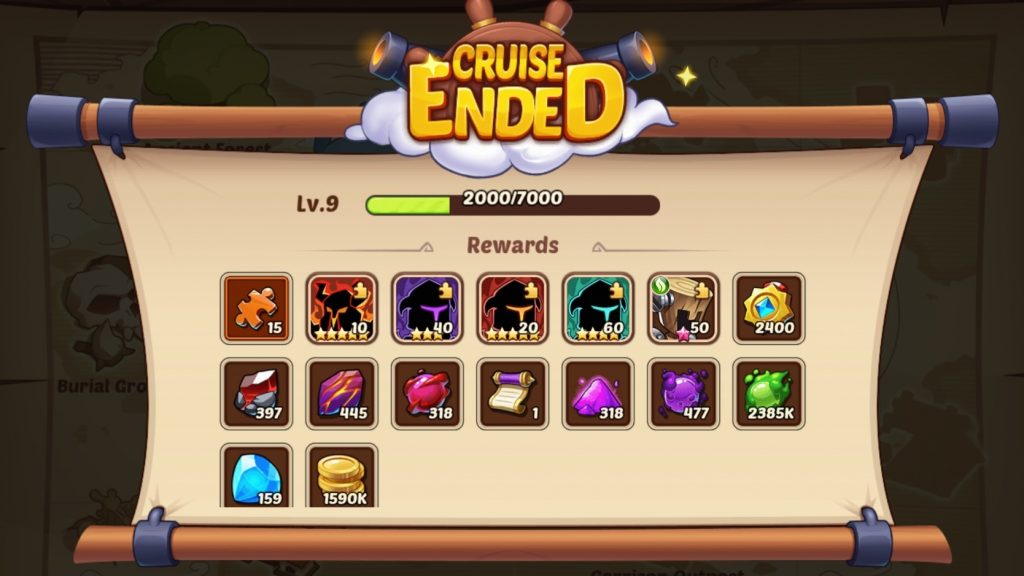
Once the cruise is over you get the rewards you collected as well as a tech point that can be used to upgrade your fleet.
It is good to note that all rewards and items you buy in Adventure will only be released to your inventory once you fully finish the voyage.
Upgrading your Engine will make you complete routes faster thus speeding up your whole progress.
We showcased upgrade priorities later on in the guide.
Which Adventure to Choose?
Each adventure route has different lengths and different rewards. The longer the cruise time is, the higher the rewards are.
Generally you want to go for the 9-star puppet routes as overall their rewards are better, but if you really need 6-star light or dark fodder, it is also a very viable option.
Below you can see the different route lengths and rewards you can get from the normal adventures.
The distance units are mention in generic in-game units, which might give a more accurate depiction of the difference in length.
Note: The time durations showcased below are estimated with a maxed out engine, so the durations below include the +40 fleet speed boost from the level 6 Engine.
Also, the islands you unlock with ship levels don’t unlock all islands of that level. The rest of them have a 0.4% chance to drop from normal exploration and if found, will unlock as routes permanently.
| Route Name | Unlock Type | Speed & Distance | Puppet Reward | Fleet EXP & Medal Rewards |
|---|---|---|---|---|
| Dwarven Ruins Freddie Island Ancient Forest Burial Grounds | Ship Level 1 | (1.21M units) |     | |
| Abandoned Port Temple Ruins | Ship Level 6 | (2.42M units) |   | |
| Gloomy Forest Uncanny Manor Magical Vines Garrison Outpost | Ship Level 10 | (5.08M units) |     | |
| Dagon's Abyss | Exploration Reward (0.12% chance) | (4.35M units) |   |
Unlocking more maps in the Adventure
The weirdest logic and lacking in explanation are the different ways you can unlock new routes to use.
The shorter 6* puppet routes are unlocked first as you travel through your first expedition. Normal maps have a 0.4% chance to drop from the normal exploration events you do daily.
Once you earn enough adventurer’s medals to upgrade your ship to level 6, you will unlock the two light and dark puppet routes.
The light and dark puppet routes are a bit longer purely due to the puppets being more valuable, so if you don’t need them, don’t do those routes.
Finally after ship level 10 you will receive a 9* puppet route (Gloomy Forest) which you should start once you unlock it.
Same as the 6* maps, new 9* routes have a 0.4% chance to drop after starting a cruise with a level 10 ship.
As seen in the table above, the rarest routes are the 9* light and dark puppet routes, which might seem odd as a 9* puppet type doesn’t make a difference when using as fodder.
However, these 2 routes can only be unlocked by pure luck as a reward for completing your daily explorations with the ship.
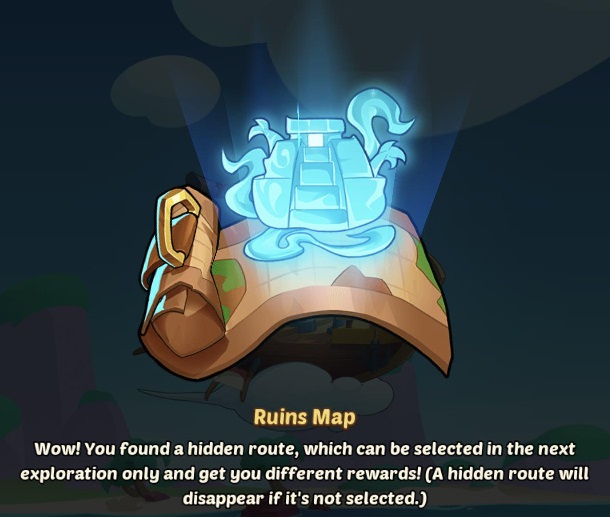
Those routes grant the same rewards, but are quite a bit shorter than the other 9* routes. That means when you find one, always select it as your next trip.
These 2 hidden routes are not permanent, so they have to be activated as your next trip or they will disappear.
After starting such a hidden route, you will need to find another one to start it up again. If you’re very lucky, you can find a new one during your active rare route.
Best Battle Setup for Adventure Mode
Battling other fleets is one of the most efficient ways to gain extra distance fast. Sadly you can only encounter a battle by using Stamina.
There’s approximately a 23% chance for a battle to occur from a Stamina exploration, and the are two different types of rewards alongside extra distance. These can either be gems or medals.
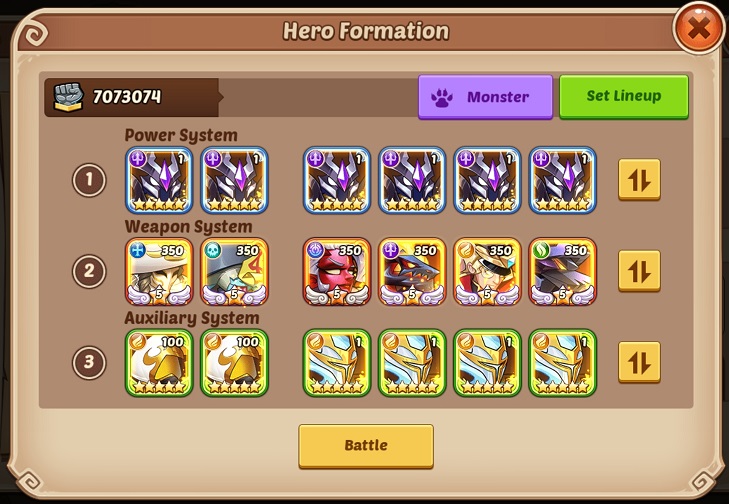
When you first start a new route, you need to select 3 different lineups, which can be confusing at first.
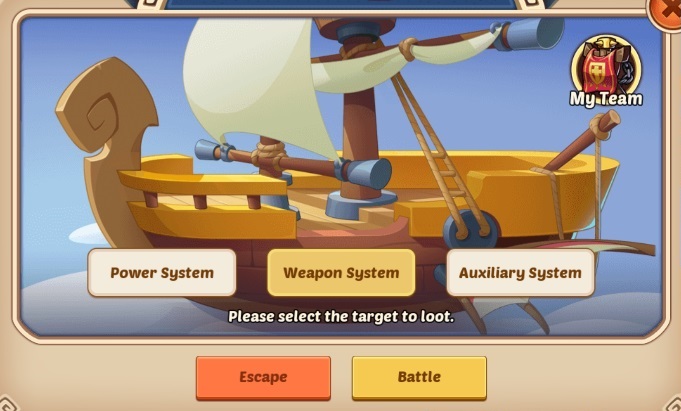
However, you only need to care about one of them. The key is to put all your best heroes into the same lineup and always attack other fleets with that same part of the ship.
For example, put all your best heroes in the second (middle) row and always attack using the Weapon System to attack with your best team only.
%22%20transform%3D%22translate(1.4%201.4)%20scale(2.84766)%22%20fill-opacity%3D%22.5%22%3E%3Cellipse%20fill%3D%22%23945d60%22%20rx%3D%221%22%20ry%3D%221%22%20transform%3D%22matrix(16.58153%2070.33147%20-146.99175%2034.65516%20116.3%2010)%22%2F%3E%3Cellipse%20fill%3D%22%23cdc379%22%20cx%3D%22127%22%20cy%3D%22175%22%20rx%3D%2287%22%20ry%3D%2287%22%2F%3E%3Cellipse%20fill%3D%22%2374a674%22%20rx%3D%221%22%20ry%3D%221%22%20transform%3D%22matrix(-5.06863%20-23.57324%2060.10939%20-12.9245%20198%2048.1)%22%2F%3E%3Cellipse%20fill%3D%22%23a36499%22%20rx%3D%221%22%20ry%3D%221%22%20transform%3D%22matrix(-50.8593%2018.46305%20-11.17454%20-30.78197%20140.3%2043.4)%22%2F%3E%3C%2Fg%3E%3C%2Fsvg%3E)
Set best lineup in only one row. %22%20transform%3D%22translate(1.3%201.3)%20scale(2.66016)%22%20fill-opacity%3D%22.5%22%3E%3Cpath%20fill%3D%22%23cb7b2f%22%20d%3D%22M66.6%2049.9L188%2060.5l-8.7%2099.6L58%20149.5z%22%2F%3E%3Cellipse%20fill%3D%22%23b1bfc2%22%20cx%3D%2223%22%20cy%3D%2292%22%20rx%3D%2229%22%20ry%3D%22255%22%2F%3E%3Cellipse%20fill%3D%22%23606e7d%22%20cx%3D%22189%22%20rx%3D%2267%22%20ry%3D%2267%22%2F%3E%3Cellipse%20fill%3D%22%23afbebb%22%20rx%3D%221%22%20ry%3D%221%22%20transform%3D%22matrix(-44.41342%20-25.45982%2060.0272%20-104.71453%20237.7%20119.4)%22%2F%3E%3C%2Fg%3E%3C%2Fsvg%3E)
Use that row to attack always!
The other lineups are of no use and have no penalties to you if other people happen to beat them.
One of the most common mistakes in Adventure mode is that people spread out their best heroes across all teams, when in reality you only need one good team.
It is good to note that many inexperienced players often set their best monsters in the first lineup, so it is often a better idea to put your best team as the second or third lineup.
Ship Upgrade Priority and Durability
The key factors with the Adventure mode ship is speed and durability.
The faster you can increase your overall speed, the faster you will progress and upgrade your ship further.
How important is Ship Durability?
Speed obviously makes you progress routes faster, but you also need to make sure your durability is at least 90, or your rewards start to hinder.
For every -10 durability below 90, your rewards from explorations will decrease by 10%, which is quite a lot. So for example if your ship is down to 50 health, you will gain 40% less rewards until your repair your ship.
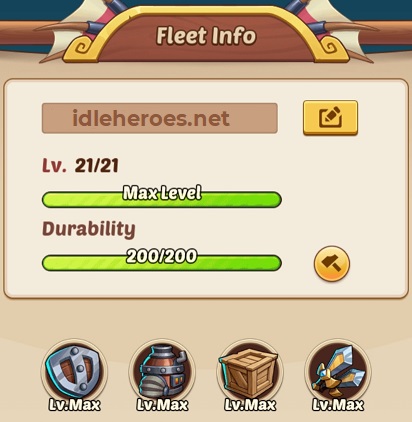
Similarly, if your durability is 60 or lower, your cruise speed is reduced by 25% and if your durability is 30 or lower, your speed decreases down to a whopping 50%.
This means you should always try to keep repairing your ship constantly, as it only costs 20 gems to repair 10 durability points and is definitely worth the price.
Ship Upgrades In-Depth
It’s good to know what exactly you get by investing into each part of your fleet.
Here you can see all the stats you need to know and you can compare this to the first table showcasing route lengths.
| Upgrade Level | ||||
|---|---|---|---|---|
| 1 | Cruising Speed: +0% Distance per day: 86K | +0% | 100 | +0% HP +0% ATK +0 SPD |
| 2 | Cruising Speed: +8% Distance per day: 93K | +6% | 120 | +12% HP +4% ATK +10 SPD |
| 3 | Cruising Speed: +16% Distance per day: 100K | +12% | 140 | +24% HP +8% ATK +20 SPD |
| 4 | Cruising Speed: +24% Distance per day: 107K | +18% | 160 | +36% HP +12% ATK +30 SPD |
| 5 | Cruising Speed: +32% Distance per day: 114K | +24% | 180 | +48% HP +16% ATK +40 SPD |
| 6 | Cruising Speed: +40% Distance per day: 121K | +30% | 200 | +60% HP +20% ATK +50 SPD |
Tech Point Priority & Upgrade Order
Your ship has a maximum level of 21 and each level gives a tech point that can be used to upgrade various bonuses.
These bonuses consist of attack boosts, cruise speed, cargo space and ship durability. There is a very clear order in which you should be using your tech points you gain from leveling up your fleet.
| Priority Order | Explanation |
|---|---|
| When it comes to the upgrade priority, you should upgrade your engine to the maximum level first. This will make your future voyages faster and therefore give your more tech points and rewards faster. | |
| Once you’ve fully upgraded your speed, then move on to cargo to receive more resources. If you are struggling to keep your ship over 90 durability, you might want to put a point into armor. | |
| The arsenal will help you defeat other fleets during exploration, so this is the more useful option. Again, upgrading your armor a little might make it easier to keep ship health over the limits. | |
| Last, you should finish upgrading the fleet armor. This is last on the upgrade priority list as the reward and speed penalties happen below 90 durability. The fleet armor will just end up giving you more peace of mind, but there’s no real use for 200 of it. |
What to buy from the Adventure Merchant
When it comes to the Local Merchant in Adventure Mode, it is quite mediocre overall.
Each item showcased in the table below has about a 5% chance to be chosen into the selection.
The best value item in the merchants wares are Prophet Orbs, since they are harder to obtain for this price, only from Aspen Dungeon. The rest of the items are debatable.
Arena Tickets can be valuable if you’re trying to push further in Inter-dimensional Arena, otherwise they’re not worth spending gems on either.
Finally come the question of Artifact Fragments. Red ones are definitely not worth anything, but Orange Exclusive artifacts like Energy Source can be useful in PvE scenarios like Seal Land.
However, there’s a very low chance to get a useful artifact from the fragments, which is why only high spenders who have tens of thousands of spare gems buy them, to be used as fodder in Ormus Workshop to upgrade other (better) artifacts.
All in all, the merchant is lackluster and aside from the occasional Scrolls and Orbs, your precious gems are better spent elsewhere.
| Item | Amount | Cost | Normal Cost (Marketplace) | Worth buying? |
|---|---|---|---|---|
Promotion Stone | ❌ Buy with gold from marketplace | |||
Dust | ❌ Get from Mysterious Chest Event or Celestial Island | |||
Summon Scroll | ➖ Same price as marketplace and Aspen Dungeon. | |||
Orb | ✔ Same price as Aspen Dungeon, cheaper than market. | |||
Ticket | ✔ Only buy Arena Tickets with gems if you REALLY need them. | |||
Coin | ❌ Only buy Wishing Coins with gold from Aspen Dungeon | |||
Wishing Coin | ❌ Never buy Super Wishing Coins! You get them from Monthly Events! | |||
 Red Artifact Red ArtifactFragment | Not for sale | ❌ Not worth spending gems | ||
 Red Artifact Red ArtifactExclusive Fragment | Not for sale | ❌ Not worth spending gems | ||
Fragment | Not for sale | ❌ Used only as fodder for Ormus Workshop | ||
Exclusive Fragment | Not for sale | ➖ Only for high spenders. Used for Ormus Workshop. | ||
Shards Package | Not for sale | ❌ Don't spend gems on skin shards. You will get some from events. |
All Exploration Events Explained
There are two different occasions that can cause an Exploration Event during an Adventure.
The main way is by using Stamina, which will trigger one of the events below and another way are the few daily events at the bottom, which can only happen once a day, but they don’t cost any Stamina.
Most of the rewards consist of various resources or extra travelled distance.
If you get a chance to pay gems for extra distance, you should always pay it.
When a reward is shown in units, it means travelled distance. In game you would see these as percentages in accordance to your current route length.
You can compare the reward distances between the table below and the Adventure maps table in the beginning.
| Event Type | Reward & Chance | Penalty |
|---|---|---|
(31.25% chance) | ❌ | |
(16.17% chance) | ❌ | |
(7.81% chance) | -10 Durability (if lost) | |
(7.03% chance) | Check the table above | ❌ |
(11.72% chance for gems) (11.72% chance for medals) | (can only get gems OR medals) | -10 Durability (if lost) |
(11.72% chance) | ||
(0.39% for normal route) (0.12% for hidden route) | Check the table above | ❌ |
Max. 1 per day (10% chance) | ❌ | |
Max. 1 per day (10% chance) | -20 Durability | |
Max. 1 per day (10% chance) | -20 Durability | |
Max. 1 per day (10% chance) | ❌ | |
Max. 1 per day (15% chance) | ❌ | -20 Durability |