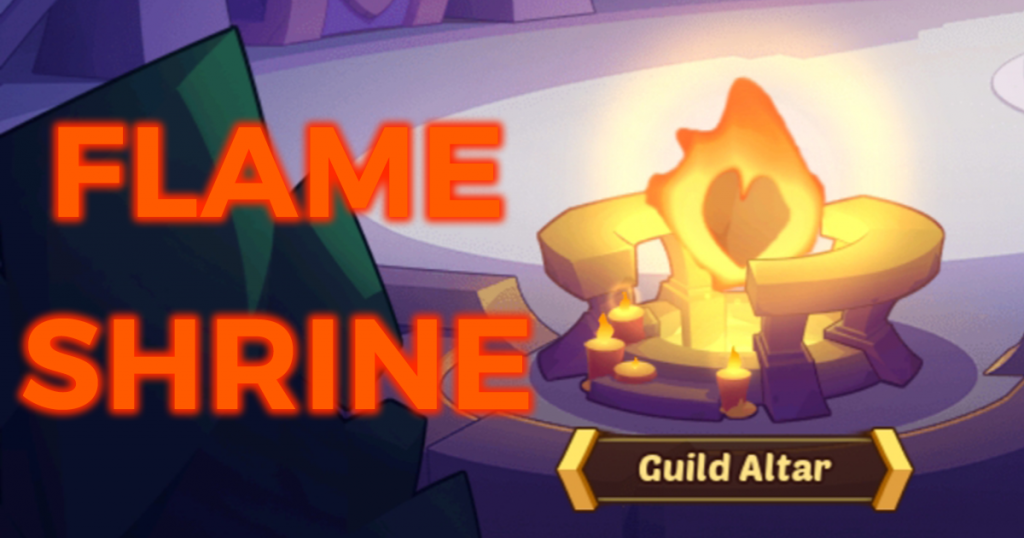
The Flame Shrine (previously known as Pray for Fire), is a way for high level guilds to get tons of gold and guild coins in return for damaging bosses that can’t be fully killed.
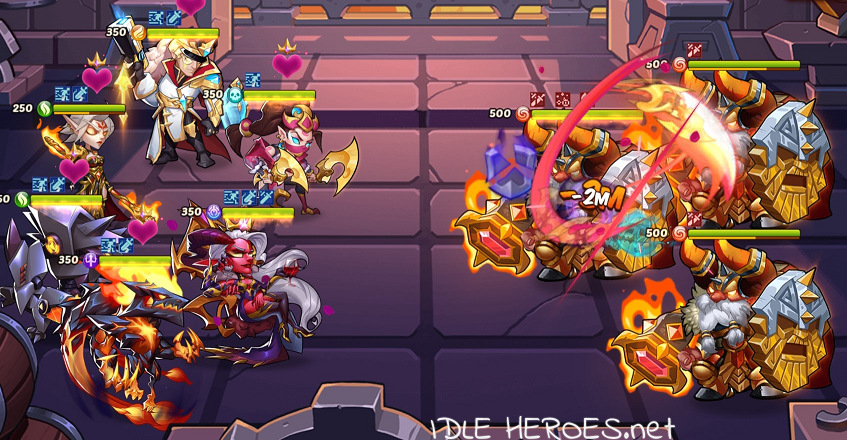
The bosses can hit hard and they have infinite health, so it’s important to know how to counter them and how to maximize your damage in any Flame Shrine boss scenario.
In March of 2021 some Guild functionality and user-interface was revamped, but the Flame Shrine functionality remains the same. You can follow this guide even with the new UI without any issues.
You can find the new Flame Shrine under Guild Altar once you’ve beaten all the Raid bosses.
What is the Guild Flame Shrine?
In order to unlock the Flame Shrine, you first need to defeat the last boss (level 60) in the guild Raid.
Once defeated, the Flame Shrine will open up and you need to sign up for it by tapping on it.
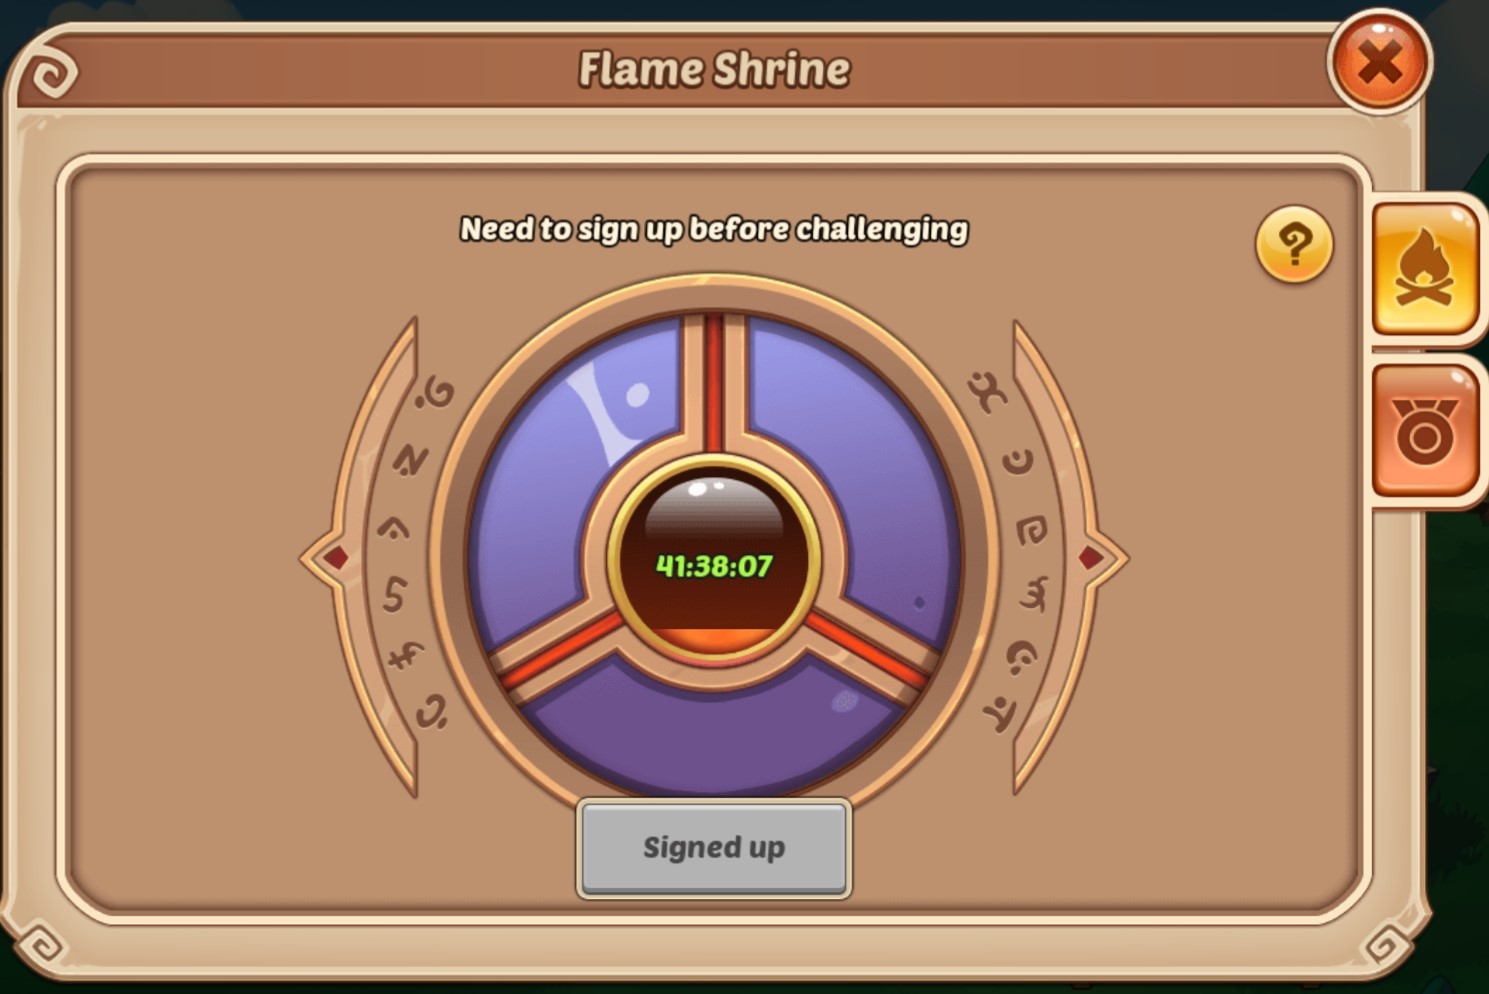
The shrine has a 2-day cooldown between each boss where you have to remember to sign up. If you forget to sign up, you will not be able to attack the boss or get any rewards for defeating it.
When the boss spawns, you can attack it 4 times a day for 3 days. You get two free attacks every day and you can pay for two more attacks for 50 gems each.
Generally if you can do noticeable damage to the boss in relation to your guild mates, it is worth paying the 100 gems every day to attack the boss for improved rewards for the entire guild. The rewards are showcased in the table below.
Since the bosses can’t die, you have 15 rounds to attack them (or until you die).
The more collective damage your guild does to the boss, the higher the rewards will be for everyone.
Flame Shrine Rewards
The rewards from Flame Shrine depend more on the total damage done by the entire guild rather than individual performance.
The rewards multipliers can go all the way up to triple rewards if you are able to do 150 billion damage to a boss.

If you sign up for the shrine and your guild doesn’t manage to do up to 10 billion damage, you will still receive the rewards seen in the first column.
As you can see the rewards differ quite a lot when comparing <10B damage and >150B damage, a whopping 5K guild coins for first place.
That is a very huge difference when it comes to guild coins, as this will be the only way to get them later on, aside from the Mysterious Chest Event.
| Ranking | >0 DMG (1x) | >10B DMG (1.3x) | >30B DMG (1.7x) | >60B DMG (2.1x) | >100B DMG (2.5x) | >150B DMG (3x) |
|---|---|---|---|---|---|---|
| 1 | ||||||
| 2 | ||||||
| 3 | ||||||
| 4 - 10 | ||||||
| 11 - 20 | ||||||
| 21 - ∞ |
Best Heroes to Build for Flame Shrine
Obviously each shrine boss has their own strengths and weaknesses so they all have a more optimal counter to them.
However, there are a few heroes that are very effective in PvE in general, which is what most people should end up building anyway.
The optimal lineups obviously depend on whether you are in the end game with multiple E5 heroes or not, so you need to try and adapt your current lineup to the boss pros and cons explained later, to first ensure you survive a full 15 rounds.
With a full E5 lineup, you can focus on dealing more damage rather than struggling to stay alive.
%27%20fill-opacity%3D%27.5%27%3E%3Cellipse%20fill%3D%22%23d692b8%22%20fill-opacity%3D%22.5%22%20rx%3D%221%22%20ry%3D%221%22%20transform%3D%22matrix(16.68038%20-40.64852%2022.05728%209.05134%2078.5%2098.2)%22%2F%3E%3Cellipse%20fill%3D%22%2384e879%22%20fill-opacity%3D%22.5%22%20rx%3D%221%22%20ry%3D%221%22%20transform%3D%22matrix(40.90556%20-48.4052%2021.07845%2017.81267%202.2%2038)%22%2F%3E%3Cellipse%20fill%3D%22%23a32c01%22%20fill-opacity%3D%22.5%22%20rx%3D%221%22%20ry%3D%221%22%20transform%3D%22rotate(-110.5%2051%20-4.8)%20scale(26.42846%2057.87358)%22%2F%3E%3Cellipse%20fill%3D%22%2319283f%22%20fill-opacity%3D%22.5%22%20rx%3D%221%22%20ry%3D%221%22%20transform%3D%22matrix(29.83746%2010.3905%20-43.20099%20124.05634%20149.5%2095.6)%22%2F%3E%3C%2Fg%3E%3C%2Fsvg%3E) Heart Watcher (Damage Boost)
Heart Watcher (Damage Boost)
 Heart Watcher (Damage Boost)
Heart Watcher is the most important hero to build for Flame Shrine (and almost any other PvE content other than Void).
When Heart Watcher attacks, she puts a mark on the enemy, after which that enemy will take 35% (45% if hit by HW’s active) more damage by any attacks.
The best part is, this damage boost can stack all the way up to 300% so as long as your Heart Watcher survives long enough to attack multiple times, you will be dealing huge numbers of damage.
You should only level up your Heart Watcher to 10-star (max. E3) as she won’t get any notable benefits from those higher levels other than higher survivability.
%27%20fill-opacity%3D%27.5%27%3E%3Cellipse%20fill%3D%22%237eb9e6%22%20fill-opacity%3D%22.5%22%20rx%3D%221%22%20ry%3D%221%22%20transform%3D%22matrix(-84.18167%20-47.82185%2015.21702%20-26.7868%2045%2021.1)%22%2F%3E%3Cellipse%20fill%3D%22%23262149%22%20fill-opacity%3D%22.5%22%20rx%3D%221%22%20ry%3D%221%22%20transform%3D%22matrix(-22.12858%20-45.82954%2020.87342%20-10.07863%2026.8%20106.5)%22%2F%3E%3Cellipse%20fill%3D%22%234d3439%22%20fill-opacity%3D%22.5%22%20rx%3D%221%22%20ry%3D%221%22%20transform%3D%22matrix(-22.13915%20-10.91581%2037.76615%20-76.59629%20147.9%2081.9)%22%2F%3E%3Cellipse%20fill%3D%22%23977366%22%20fill-opacity%3D%22.5%22%20rx%3D%221%22%20ry%3D%221%22%20transform%3D%22matrix(48.62605%20-.0158%20.00681%2020.95589%2086.7%20100.8)%22%2F%3E%3C%2Fg%3E%3C%2Fsvg%3E) Ithaqua (Damage Dealer & Self-heal)
Ithaqua (Damage Dealer & Self-heal)
 Ithaqua (Damage Dealer & Self-heal)
Ithaqua is a great PvE hero overall, as she has massive damage-over-time and great survivability through self-heals.
Her attacks inflict a mark on the lowest HP enemy and her active will duplicate any attack on those inflicted by the mark and heal Ithaqua by the attacked amount, which usually ends up fully healing her up while dealing great damage.
Even without using any Delaciums, she is a great damage dealer to add to your lineup.
%27%20fill-opacity%3D%27.5%27%3E%3Cellipse%20fill%3D%22%23002e5c%22%20fill-opacity%3D%22.5%22%20rx%3D%221%22%20ry%3D%221%22%20transform%3D%22matrix(41.19224%2042.774%20-24.09773%2023.2066%2010.3%20137.4)%22%2F%3E%3Cellipse%20fill%3D%22%23b3c797%22%20fill-opacity%3D%22.5%22%20rx%3D%221%22%20ry%3D%221%22%20transform%3D%22matrix(-28.07198%2020.39549%20-45.49748%20-62.62191%2041%2062.7)%22%2F%3E%3Cellipse%20fill%3D%22%23342c4b%22%20fill-opacity%3D%22.5%22%20rx%3D%221%22%20ry%3D%221%22%20transform%3D%22matrix(-27.23713%20-4.16787%2010.6333%20-69.48887%20132.3%20108.5)%22%2F%3E%3Cellipse%20fill%3D%22%2388b946%22%20fill-opacity%3D%22.5%22%20rx%3D%221%22%20ry%3D%221%22%20transform%3D%22rotate(-4.6%20384.5%20-764)%20scale(84.12227%2028.06228)%22%2F%3E%3C%2Fg%3E%3C%2Fsvg%3E) Rogan (Team Buffs & Heals)
Rogan (Team Buffs & Heals)
 Rogan (Team Buffs & Heals)
Rogan is a great hero all around in PvP and PvE, which is why you should definitely build one no matter what.
It is crucial to make Rogan survive as long as possible, as he provides Bloodthirsty to your heroes which provides an attack boost as well as healing to that hero.
Rogan also increases all allies attack by 20% and crit damage by 10% for two round after every round, which stacks up to be a lot of extra damage.
Using multiple Rogans is also a great option for that added attack damage boost at the end of each round.
%22%20transform%3D%22translate(.5%20.5)%22%20fill-opacity%3D%22.5%22%3E%3Cpath%20fill%3D%22%23a781f1%22%20d%3D%22M-16%20103L-4-11%2077%202z%22%2F%3E%3Cellipse%20fill%3D%22%23343e24%22%20cx%3D%2270%22%20cy%3D%22144%22%20rx%3D%2255%22%20ry%3D%2225%22%2F%3E%3Cellipse%20fill%3D%22%23262e15%22%20rx%3D%221%22%20ry%3D%221%22%20transform%3D%22matrix(16.12426%20-8.78434%2014.8482%2027.25491%20132.7%2044.6)%22%2F%3E%3Cellipse%20fill%3D%22%23792da0%22%20rx%3D%221%22%20ry%3D%221%22%20transform%3D%22rotate(6.3%20-424.2%20581.4)%20scale(54.67398%2023.07862)%22%2F%3E%3C%2Fg%3E%3C%2Fsvg%3E) Drake (Support)
Drake (Support)
 Drake (Support)
Drake is a great addition because he has amazing dodge chance through his Shadow Lure passive to avoid those pesky first slot attacks.
However, where Drake shines in Flame Shrine is through his Black Hole Mark, which is inflicted on an enemy every time Drake attacks them.
This mark detonates after each round dealing an extra 60% of all the damage that target received that round.
Finally, when the battle starts and every time a round ends, Drake removes all armor and damage reduction buffs from the enemy with the lowest HP, which helps deal tons more damage.
It is good to note that Drake is also a very good support hero in PvP, which makes him a very good option to build.
%22%20transform%3D%22translate(.5%20.5)%22%20fill-opacity%3D%22.5%22%3E%3Cellipse%20fill%3D%22%23251e40%22%20rx%3D%221%22%20ry%3D%221%22%20transform%3D%22matrix(26.81112%20-15.50028%2036.00892%2062.28528%20149%20111)%22%2F%3E%3Cellipse%20fill%3D%22%23ce9d62%22%20cx%3D%2215%22%20cy%3D%2213%22%20rx%3D%2289%22%20ry%3D%2235%22%2F%3E%3Cellipse%20fill%3D%22%23a25024%22%20cx%3D%2265%22%20cy%3D%2252%22%20rx%3D%2259%22%20ry%3D%2233%22%2F%3E%3Cellipse%20fill%3D%22%23a9778e%22%20rx%3D%221%22%20ry%3D%221%22%20transform%3D%22rotate(-71%20116.5%206)%20scale(41.00639%2025.48469)%22%2F%3E%3C%2Fg%3E%3C%2Fsvg%3E) Delacium
Delacium
 Delacium
Delacium is known for breaking all of the damage records in Flame Shrine, because having multiple Delaciums in the correct lineup allows for absolutely massive damage which can’t be matched by any other heroes by a long shot.
However, a Delacium needs to correct kind of lineup surrounding it, so it is not recommended for early game as it won’t help you much elsewhere in the game. (Delaciums add DoT stacks and extend their durations, do heroes like Ithaqua become godlike in long battles.)
If you are interested in utilizing this hero, search up ‘Delacium Army’ on YouTube to find some great lineup ideas. We will be writing a proper guide on how to build your own Delacium Army for Flame Shrine later on. If you would like to be notified of that guide, leave a message through our contact form and we will e-mail you the link once it’s finished.
All Flame Shrine Bosses Explained
All the Flame Shrine bosses have their own strengths and weaknesses, so it’s good to know what to look for and what to avoid when preparing for battle.
You should also take note of the classes we added next to the boss names, as there are many artifacts which will increase damage against a certain type of enemy. For example, a level 1 Azrael artifact will increase your hero’s damage against Rangers like Malassa by a whopping 40%.
These cheap niche artifacts can be especially useful to boost your Flame Shrine and Seal Land damage before you get access to upgradable end-game artifacts.
These explanations are more useful in early- and mid-game, as towards the endgame you should just focus on building high-damage-dealer combinations from the list of heroes mentioned above, as survivability won’t be such a huge issue anymore.
Barea (%22%20transform%3D%22translate(.5%20.5)%22%20fill-opacity%3D%22.5%22%3E%3Cellipse%20fill%3D%22%23df8b4a%22%20rx%3D%221%22%20ry%3D%221%22%20transform%3D%22matrix(40.63721%2040.93298%20-20.09076%2019.9456%2073.6%2067.9)%22%2F%3E%3Cellipse%20fill%3D%22%231b4163%22%20cx%3D%2285%22%20cy%3D%22149%22%20rx%3D%22149%22%20ry%3D%2222%22%2F%3E%3Cpath%20fill%3D%22%23672600%22%20d%3D%22M112%207l23%2052.1L104%2073%2080.8%2020.9z%22%2F%3E%3Cellipse%20fill%3D%22%23425f75%22%20rx%3D%221%22%20ry%3D%221%22%20transform%3D%22rotate(88.2%2052%2098.6)%20scale(149%2021.06142)%22%2F%3E%3C%2Fg%3E%3C%2Fsvg%3E) Warrior)
Warrior)
Barea’s attacks focus on the frontline heroes, so you need to make sure to keep them alive and put your support heroes and damage dealers in the back.
Due to Barea’s active attack and high critical hit chance destroying the frontline, you need high HP and healing for those heroes. The deer pet will also help with those heals more than other pets.
Barea also steals armor, making him really strong after 5 or so rounds. This means it might be a good idea to try remove the debuff from your heroes.
Make sure to put your support heroes like Heart Watcher in the back and if you keep getting destroyed by Barea’s actives, you can try heroes like Carrie to reduce their energy to ensure you won’t get hit by 3 actives before managing to heal.
Kamath (%27%20fill-opacity%3D%27.5%27%3E%3Cellipse%20fill%3D%22%23718822%22%20fill-opacity%3D%22.5%22%20rx%3D%221%22%20ry%3D%221%22%20transform%3D%22matrix(37.78365%2043.0916%20-37.62153%2032.98738%2070%2065.8)%22%2F%3E%3Cellipse%20fill%3D%22%23302b33%22%20fill-opacity%3D%22.5%22%20rx%3D%221%22%20ry%3D%221%22%20transform%3D%22matrix(14.87062%2022.12981%20-51.16479%2034.38131%20110.3%20121.8)%22%2F%3E%3Cellipse%20fill%3D%22%2371af58%22%20fill-opacity%3D%22.5%22%20rx%3D%221%22%20ry%3D%221%22%20transform%3D%22matrix(13.70728%20-11.02094%2018.51856%2023.03245%2050.9%2046.9)%22%2F%3E%3Cpath%20fill%3D%22%230b75ee%22%20fill-opacity%3D%22.5%22%20d%3D%22M136.5%20136.5h14v14h-14z%22%2F%3E%3C%2Fg%3E%3C%2Fsvg%3E) Ranger)
Ranger)
Kamath is the opposite in comparison to Barea, as Kamath attacks your backline heroes instead. This means you should add your main damage dealer (or one that can’t heal) and weakest support hero like Heart Watcher to the two front slots.
As for the backline, you should include your more durable heroes and make sure to change any E3-E5 heroes third enabling skill to Purify, which removes one random debuff from that hero.
You could also add counter-attack heroes or reflective damage capabilities to the backline.
These two are a great way to counter Kamath’s crowd control.
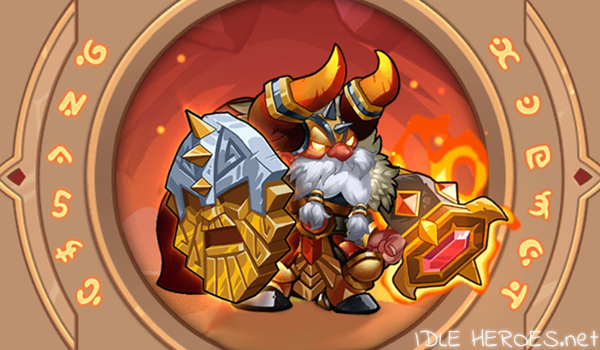
Sigmund ( Warrior)
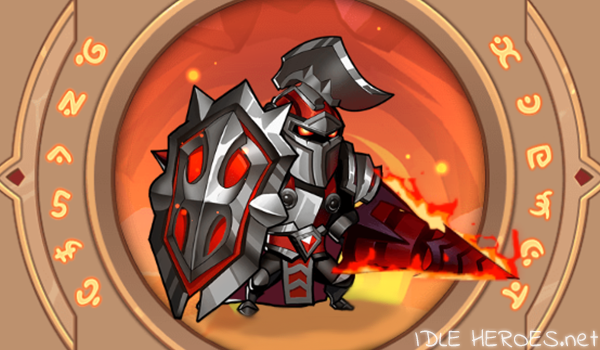
Sigmund is one of the harder bosses in Flame Shrine as he does damage over time (DoT) as well as counter-attacks and armor reduce after each hit.
Sigmund hits the first alive hero (starting from slot 1) with his basic attack every turn, then 3 random enemies with his active attack.
The best way to counter Sigmund is by putting your most durable heroes in the frontline as they will be tanking the basic attacks.
A healer is also very useful to keep you alive through all the damage over time as well as remove the burn effects.
Using the Purify enabled skill on any E3 heroes is a great way to mitigate the DoT burn that Sigmund deals.
Malassa ( Ranger)
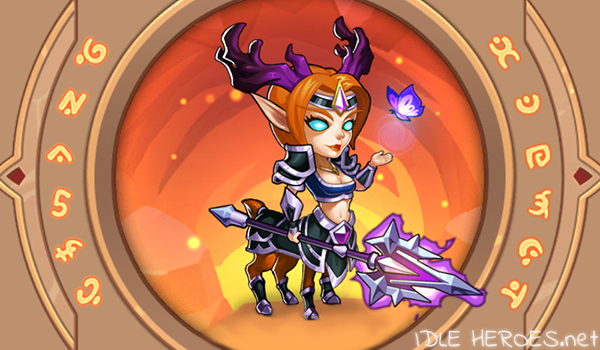
Malassa attacks 3 heroes by random with her basic attack and 4 heroes with her active, so the order of your lineup doesn’t make a difference.
Malassa also has a 30% chance to critical hit which also deals poison damage over time, which can be devastating especially to low health heroes.
She also does extra damage on any hero affected by poison, which is why using Purify or other means to remove debuffs are important here.
Damage reduction and healing are important for survivability against Malassa, since she can hit very hard if you are unlucky with the critical hits and the poison damage will start to hurt over multiple rounds.
Dark Arthindol (%27%20fill-opacity%3D%27.5%27%3E%3Cellipse%20fill%3D%22%2367ccff%22%20fill-opacity%3D%22.5%22%20rx%3D%221%22%20ry%3D%221%22%20transform%3D%22rotate(-138.6%2051.2%2017.9)%20scale(28.58267%2045.66284)%22%2F%3E%3Cellipse%20fill%3D%22%2337211d%22%20fill-opacity%3D%22.5%22%20rx%3D%221%22%20ry%3D%221%22%20transform%3D%22matrix(17.7511%2022.88458%20-76.33516%2059.21162%20104.4%20127.5)%22%2F%3E%3Cellipse%20fill%3D%22%23382822%22%20fill-opacity%3D%22.5%22%20rx%3D%221%22%20ry%3D%221%22%20transform%3D%22matrix(25.53706%20-56.03596%2014.79822%206.74394%2016.4%2062.5)%22%2F%3E%3Cellipse%20fill%3D%22%2380b7f5%22%20fill-opacity%3D%22.5%22%20rx%3D%221%22%20ry%3D%221%22%20transform%3D%22matrix(21.06967%20-20.41794%2011.54947%2011.91813%2079.6%2063.1)%22%2F%3E%3C%2Fg%3E%3C%2Fsvg%3E) Mage)
Mage)
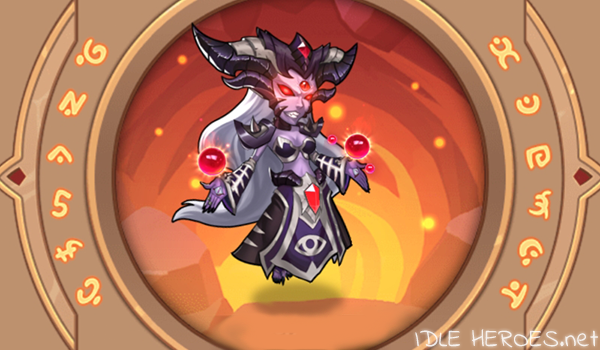
Dark Arthindol is one of the easier bosses, as they don’t hit too hard and focus on crowd controlling your heroes instead.
Dark Arthindol’s basic attack hits the first slot and removes energy through Petrify. This means if a hero relies on their active skill to deal proper damage, you should place those in the backline.
DA’s active attack hit’s all heroes and does more damage then the basic attack, but in comparison is still not very high. Dark Arthindol relies on buffing herself with various attack, skill damage and damage reduce boosts.
You can use heroes like Carrie to reduce DA’s energy so she won’t buff herself and deal higher damage with the active skill.
Again, using Purify is extremely useful when it comes to dealing with DA’s crowd control attacks.
Faith Blade (%22%20transform%3D%22translate(.5%20.5)%22%20fill-opacity%3D%22.5%22%3E%3Cellipse%20fill%3D%22%23ca55e2%22%20rx%3D%221%22%20ry%3D%221%22%20transform%3D%22rotate(53.4%20-42.9%20109.9)%20scale(33.63967%2052.71741)%22%2F%3E%3Cellipse%20fill%3D%22%232b3420%22%20rx%3D%221%22%20ry%3D%221%22%20transform%3D%22matrix(134.46537%20-55.14827%208.41652%2020.5216%2075.4%20143)%22%2F%3E%3Cpath%20fill%3D%22%234f3127%22%20d%3D%22M-9.3%2069.3l35-71.9%2039.6%2019.3-35%2071.9z%22%2F%3E%3Cellipse%20fill%3D%22%2361161c%22%20cx%3D%22117%22%20cy%3D%2231%22%20rx%3D%2214%22%20ry%3D%2217%22%2F%3E%3C%2Fg%3E%3C%2Fsvg%3E) Assassin)
Assassin)
Faith Blade can often be very problematic as he attacks the lowest HP hero with the basic attack.
The main problem arises when someone dies, Faith Blade gets a damage boost and full energy instantly.
This means it is crucial not to let any of your heroes die, or Faith Blade will keep dealing huge damage each turn killing your entire team very fast if you aren’t careful.
Faith Blades active attack targets two of your heroes at random, which does slightly higher damage than the basic attack, but relies on the damage buff provided by the death of your heroes.
There is really no other strategy to dealing with Faith Blade other than bringing high health heroes and very good healing for any low health heroes like Heart Watcher.
If you don’t have a full lineup of strong heroes, just leave those slots empty to prevent giving Faith Blade any easy death buffs.
Which Pet to use in Flame Shrine?
When it comes to Flame Shrine, by far the most popular pet is the Phoenix as she will help do a lot more damage with the endgame lineups.
The only issue with Phoenix is that although you will deal more damage in comparison to most other pets, you need to figure out if you die too early without any heals.
If you notice that your lineup dies too fast early on, try using the Deer pet for passive heals. This might help your team survive a few more rounds and end up dealing more damage in the long run.
If you always survive the full 15 rounds, Deer is not worth it as it doesn’t increase your damage enough.
However, it is good to note that you should max out one pet first, so if you have started on one already, you should finish that one first and use it in Flame Shrine until you have maxed out a new, possibly better one.